
One of the first steps to improving the image quality on your webcam is to understand the settings available within the webcam software and the operating system. Many webcams come with built-in software that allows users to adjust various parameters to optimize the image quality:
- Resolution is one of the most important settings to check. Most modern webcams offer resolutions of 720p (HD) or 1080p (Full HD), while some premium models can provide 4K resolution. Higher resolution results in a sharper and clearer image. If your webcam supports 1080p or higher, ensure that your settings reflect that resolution for the best visual quality.
- Frame rate is another crucial setting. A higher frame rate, such as 60fps (frames per second), will make video smoother, especially for activities such as gaming or video conferencing. Lower frame rates, such as 30fps, are acceptable for basic video calls but may result in choppy or stuttery video if there is motion.
- White balance is another setting that can significantly impact the color accuracy of your video. This setting ensures that the colors in your video appear natural and not overly warm or cool. Most webcams automatically adjust white balance, but manual tweaking may be necessary in certain lighting conditions.
- Exposure is the setting that controls how much light is captured by your webcam. In low-light environments, increasing exposure can help brighten the image, but too much exposure can lead to overexposure, making the image too bright and washed out. On the other hand, reducing exposure in well-lit environments can prevent overexposure and help maintain image detail.
- Finally, focus is an essential setting, especially for webcams that feature autofocus. If your webcam has this capability, ensure it’s properly calibrated to focus on you, not on the background. If your camera doesn’t have autofocus, manually adjusting the focus can help achieve a sharp image.
Lighting: The Key to Better Webcam Image Quality
Lighting plays a significant role in webcam image quality. Even the best webcam can produce poor results if the lighting isn’t right. The goal is to have adequate, even lighting that eliminates harsh shadows and ensures your face is properly lit without overexposure. Here are some tips for improving your lighting setup: Natural light is often the best source of illumination. Position yourself near a window with good daylight. However, be mindful of the direction of the light. Direct sunlight can cause harsh shadows, so try to diffuse the light by drawing curtains or placing a sheer cloth over the window. Soft natural light provides the best and most flattering illumination.
If natural light is unavailable, artificial lighting can help improve webcam quality. Invest in a softbox or ring light, which are commonly used in photography and video production. These lights provide soft, diffused light that minimizes shadows and ensures even illumination on your face. A three-point lighting setup is ideal for those who want to take their lighting to the next level. This technique uses three lights: a key light, a fill light, and a backlight. The key light is placed at a 45-degree angle in front of you to provide the main illumination. The fill light, placed on the opposite side of the key light, helps to reduce shadows. Finally, the backlight is positioned behind you to create separation from the background and add depth to the image. Avoid overhead lighting, as it can create harsh shadows under your eyes and chin. Instead, place your lighting sources at eye level to achieve the most flattering look. You can also experiment with light intensity by using dimmers or adjustable lighting to find the perfect balance.
Camera Position and Framing
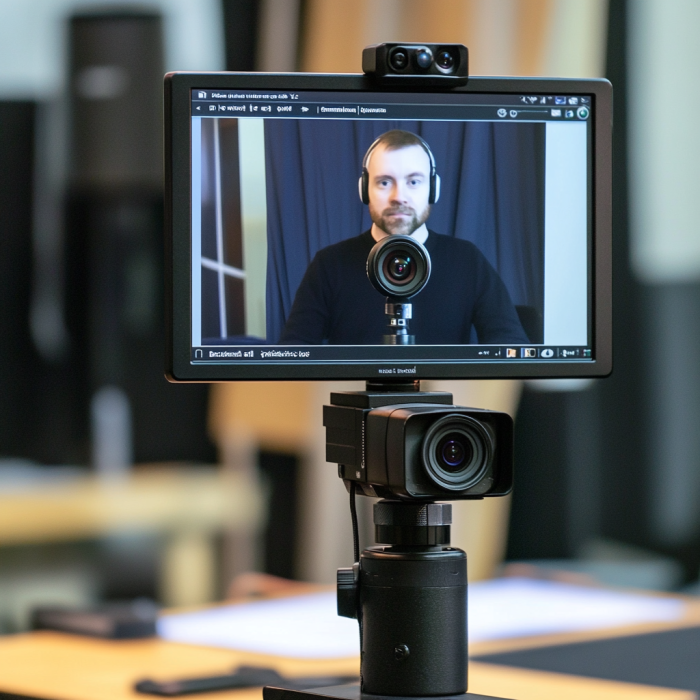
The positioning of your webcam can have a significant impact on the quality of your image. A poor camera angle can make you appear distorted or unflattering, so finding the right position is crucial. Camera height is important. Position the webcam at or slightly above eye level to create a more natural and flattering perspective. This angle prevents the dreaded “up-the-nose” shot and ensures that you appear more engaged and confident on camera.
Camera angle also matters. Aim to keep your webcam facing directly towards you, rather than tilting it up or down. This helps maintain a professional appearance and ensures that your face is well-lit and in focus. If you have a built-in laptop webcam, consider using a stand or external camera to achieve the ideal angle. Framing is another consideration. Ideally, you want to position yourself so that your face is centered in the shot, with some space above your head and around your shoulders. Too much empty space or a zoomed-in shot can make you appear either disconnected or cramped. Maintain a balanced frame to ensure you look both professional and approachable.
Upgrading with Webcam Accessories
To take your webcam quality to the next level, consider adding accessories that improve lighting, stability, and overall performance. Here are a few essential accessories that can significantly enhance your webcam experience: Webcam mounts and tripods can help stabilize your webcam and ensure it is positioned correctly. If you use an external webcam, investing in a sturdy tripod will prevent the camera from shaking or tilting during use, resulting in a smoother, more professional-looking video. Ring lights are a popular accessory for streamers and content creators. They offer soft, diffused lighting that eliminates shadows and highlights your face evenly. Some ring lights even come with adjustable color temperatures, allowing you to customize the lighting to suit your environment and skin tone. This can make a huge difference in achieving a polished look.
External microphones are also worth considering, as audio quality is just as important as video quality. Built-in microphones on webcams often pick up background noise and deliver muffled sound. An external microphone provides clearer, more professional audio and ensures that your voice is crisp and clear during video calls or streams. If you’re concerned about privacy, consider purchasing a webcam cover. A small, inexpensive accessory, webcam covers slide over your camera when not in use, ensuring your privacy and preventing accidental activation of your webcam.
Common Webcam Problems and How to Fix Them
Even with the best settings and accessories, you may encounter issues with your webcam image quality. Here are some common problems and solutions to help you troubleshoot: Blurry Image: If your webcam produces a blurry image, ensure the lens is clean and free of fingerprints or dust. If the problem persists, check your focus settings. Some webcams allow manual focus adjustment, while others may have autofocus. If your webcam lacks autofocus, consider investing in an external camera with better optics. Low Frame Rate: If your webcam video is choppy, it may be due to a low frame rate or insufficient system resources. Check that your webcam is set to a higher frame rate (e.g., 60fps) in the settings. Additionally, close unnecessary applications on your computer to free up processing power.
Poor Lighting: In low-light environments, your webcam may struggle to capture clear images. Ensure that your lighting is well-distributed and that no light sources are directly behind you. Using a ring light or other artificial lighting can help brighten your image. Audio Problems: If the sound is distorted or delayed, it could be due to a poor microphone or an issue with your computer’s audio settings. Consider upgrading to an external microphone, and check your sound settings to ensure the correct input device is selected.
Advanced Tips for Professional-Quality Webcam Footage
For content creators or professionals who need top-notch webcam footage, there are several advanced tips you can apply to further enhance your video quality: Use a DSLR or Mirrorless Camera: For those who are serious about webcam quality, using a DSLR or mirrorless camera as a webcam is an excellent option. With the right adapter and software, you can connect your camera to your computer for incredibly sharp, high-quality footage that far exceeds the capabilities of typical webcams.
Color Grading: Advanced users can improve the overall look of their video through color grading. Using software such as OBS Studio or Adobe Premiere Pro, you can adjust the color, contrast, and saturation to create a more cinematic look. This is particularly useful for content creators or streamers who want to stand out with polished visuals. High-Speed Internet Connection: A strong and stable internet connection is essential for ensuring that your high-quality video streams smoothly without lag. If you’re streaming or participating in video calls, ensure your internet connection can handle high-definition video.
Questions and Answers
Increasing the frame rate to 60fps and ensuring your system is optimized for video processing can help create smoother video footage. Additionally, good lighting and a stable camera position can reduce stutter.
Clean the webcam lens, adjust the focus settings, and ensure you have adequate lighting. If your webcam lacks autofocus, you may need to manually adjust the lens or invest in a higher-quality camera.
While not strictly necessary, a ring light can greatly improve your lighting setup, providing soft, even light that eliminates shadows and highlights your face better than standard overhead lighting.
If your audio is distorted or unclear, consider investing in an external microphone. Additionally, check your audio settings to ensure the correct input device is selected.
The ideal camera height is at or slightly above eye level. This prevents unflattering angles and ensures that your face is framed naturally, leading to a more professional and engaging appearance on camera.